Pilnīgs ceļvedis par sūnu stabiem
Atbilstoša staba izmēra izvēle
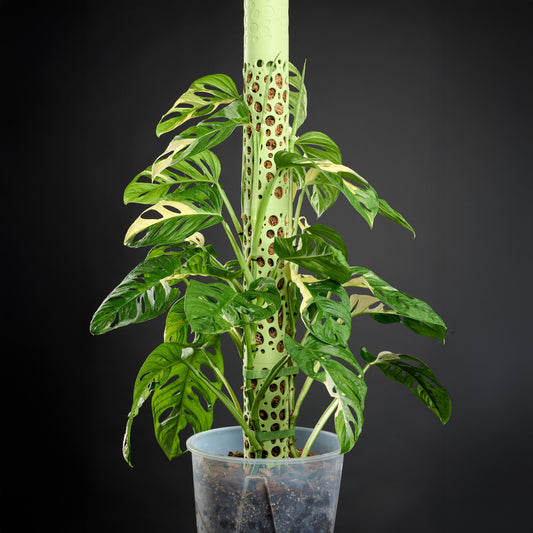
Mēs piedāvājam sūnu stabu sistēmas divos diametros: M – 5,1 cm un L – 6,6 cm. M izmērs ir piemērots augiem ar mazākām saknēm līdz 10 mm diametrā, piemēram, Philodendron Splendid. L izmērs ir ideāli piemērots augiem ar saknēm līdz 15 mm diametrā, piemēram, Monstera Thai Constellation.
Runājot par sūnu staba augstumu, varat sākt ar to, kas jūsu augam nepieciešams tieši tagad, un vēlāk pēc vajadzības pievienot papildu moduļus.
Atbilstošas pamatnes izvēle jūsu sūnu stabam
Piemērotas pamatnes izvēle jūsu sūnu stabam ir ļoti svarīga, lai nodrošinātu stabilitāti un auga veselību. Mēs piedāvājam trīs veidu pamatnes: koncentrisku enkuru, nobīdītu enkuru un mietu.

- Enkurs (koncentrisks): Ideāli piemērots āroīdu augiem ar vairākiem stublājiem, kas aug ap sūnu stabu, piemēram, filodendriem un monsterām. Šī pamatne nodrošina, ka jūsu sūnu stabs paliek stingri nostiprināts podā.
- Nobīdīts enkurs: Vislabāk piemērots vienkāta āroīdu augiem, piemēram, antūrijām un pothos. Šī pamatne nodrošina atbalstu bez nepieciešamības bieži pārstādīt.
- Miets: Vienkāršāks variants mazākiem vai mazāk augšdaļā smagiem augiem.
Izvēloties enkura izmēru, saskaņojiet pamatnes diametru ar poda diametru. Pamatnes augstumam jābūt nedaudz lielākam par poda augstumu, lai sūnas nesaskartos ar augsni, kas var izraisīt puvi.
Enkura pamatnes uzstādīšana
- Ievietojiet enkura pamatni tukša poda apakšā. Papildu stabilitātei to pēc izvēles var nostiprināt ar plastmasas savilcējiem, izverot tos caur pamatnē paredzētajiem caurumiem.
- Kad enkura pamatne ir vietā, varat sākt stādīt augu. Pārliecinieties, ka augs ir stingri iestādīts un pamatne ir stabila. Stādiet pareizā novietojumā, nodrošinot, ka saknes ir vērstas uz ar sūnām pildītajiem moduļiem.

Sūnu sagatavošana un sūnu staba salikšana
- Pirms moduļu pildīšanas ar sūnām iemērciet sfagnu sūnas ūdenī, līdz tās ir pilnībā samitrinātas. Nepiepildiet moduļus pārāk cieši, lai saknēm būtu vieta augšanai.
- Droši savienojiet moduļus savā starpā un ar enkura pamatni. Tas nodrošina stingru konstrukciju, pa kuru augam kāpt.
- Uzmanīgi ievietojiet esošās saknes sūnās, lai tām būtu tiešs kontakts un tās varētu izmantot sūnu staba nodrošināto mitrumu un atbalstu. Izmantojiet Velcro saites, lai piestiprinātu augu pie sūnu staba vismaz līdz brīdim, kad augs ir stingri iesakņojies sūnu stabā. Tas palīdzēs stabilizēt augu un virzīt gaisa saknes sūnās.

Nav ieteicams izmantot plastmasas savilcējus, lai piestiprinātu augu pie atsevišķiem sūnu staba šķērsstieņiem. Šī metode var bojāt augu, iegriežoties tā stublājos un saknēs, īpaši augam augot un saitēm kļūstot ciešākām. Turklāt atsevišķi šķērsstieņi nav tik izturīgi kā visa sūnu staba konstrukcija un slodzes ietekmē var salūzt, apdraudot visas sistēmas stabilitāti un viengabalainību. Vienmēr izmantojiet saudzīgas, augam draudzīgas metodes, piemēram, Velcro saites, lai gan jūsu augs, gan sūnu stabs paliktu veseli un nebojāti.
Mitruma uzturēšana ar pilienveida laistīšanu
- Pilienu vārsta regulēšana: Pilienveida sistēmā ir vārsts ūdens plūsmas regulēšanai. Kad sūnas ir sausas, pilnībā atveriet vārstu un vairākas reizes piepildiet pilienu rezervuāru, lai sūnas rūpīgi samitrinātu.
- Mitruma līmeņa uzturēšana: Kad sūnas ir pietiekami mitras, pievelciet vārstu līdz gandrīz aizvērtai pozīcijai. Tas ļaus sistēmai uzturēt lēnu, vienmērīgu ūdens padevi, saglabājot sūnas pastāvīgi mitras.

Ievērojot šos soļus, jūs varat nodrošināt, ka jūsu sfagnu sūnu stabs sniedz ideālu atbalstu un vidi jūsu kāpjošajiem āroīdu augiem. Atcerieties regulāri pārbaudīt mitruma līmeni un pēc vajadzības pielāgot pilienveida laistīšanu, lai jūsu augi būtu veseli un turpinātu augt.